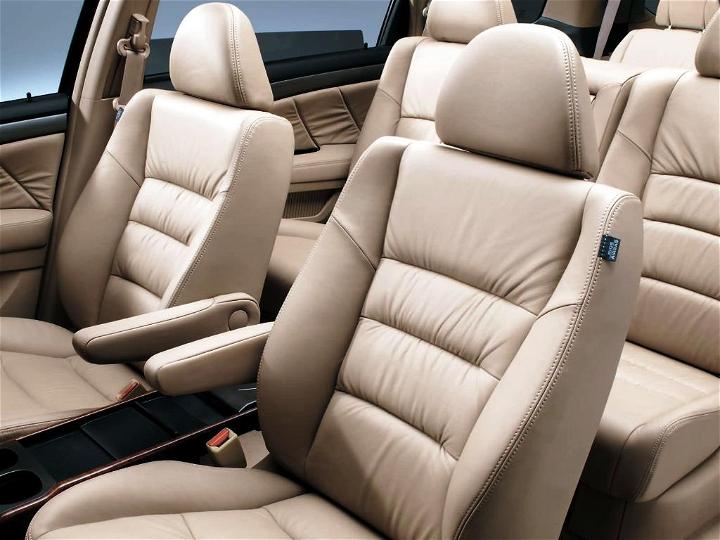
Leather car seats are very popular and they can make a car look much more expensive, much more sleek, and can even be much more comfortable. But unbeknownst to many people, leather car seats require a lot of maintenance, and without the correct care, a leather car interior may become damaged. You should be sure to look after your leather regularly to keep your car looking as great as the day you bought it. After all, preventing damage is just as important as repairing damage.
Where to start when it comes to leather car seat repair
Equipment
The best advice to follow if you’re unsure where to start with your leather seat repairs is to make sure you have all of the right tools first. There is an extensive list of products that you might need, depending on the extent and location of the damage. If you are into leather crafts or have other leather accessories then you can use these again. Typically, the tools you will require for leather car seat repair are:
- Auto leather repair kit (this should include leather mixing paints, backing fabric, leather adhesive, a spatula, a brush, heat-set filler, textured mat or pad, and possibly even leather conditioner)
- Mild sandpaper
- Denatured alcohol
- A microfiber cloth
- A cleaning cloth
- Dish soap
- Warm water
- A palette knife
You might also find having some liquid leather on hand useful. Ultimately, the exact tools that you will need depend on what the damage is, but with this arsenal you should be completely prepared for any damage both now and in the future.
Repairing cracks in leather car seats
If you’ve noticed cracks appearing in your leather seats, there are a few things that you can do. First of all, if your cracks are new and small, you might be able to get rid of them by simply using leather conditioner to moisturise the dry leather car seat. For larger cracks, however, you will have to put in a bit more work. To do so, you should:
1. Clean leather car seat
The first step in repairing cracked leather is to clean the leather car seat. Use a cleaning cloth, dish soap and warm water to wipe off any grime, dust or dirt sitting on the leather.
2. Leave leather to dry
It is crucial that there is no moisture on the leather when you begin to repair your leather seats, so you should leave your leather to dry for a minimum of a few hours – but overnight would be best.
3. Smooth the leather car seat
Once you’re sure that the leather is dry, you should use a mild sandpaper to smooth the leather car seat down. This will remove any rough material and allow you to better fill the cracks.
4. Fill the cracks
The next step is to simply fill the cracks using a filler or liquid leather and a palette knife. This is relatively simple, although deep cracks may require multiple thin layers or coats of the leather filler. In which case, be sure to let the filler dry before going in for another coat.
5. Dye the filler
This step is optional, but you may choose to then use leather dye on the damaged area in order to ensure that the filler blends in with the rest of your leather car interior. Some leather fillers are coloured, so ensure that you use one that is relatively close in colour to your own leather.
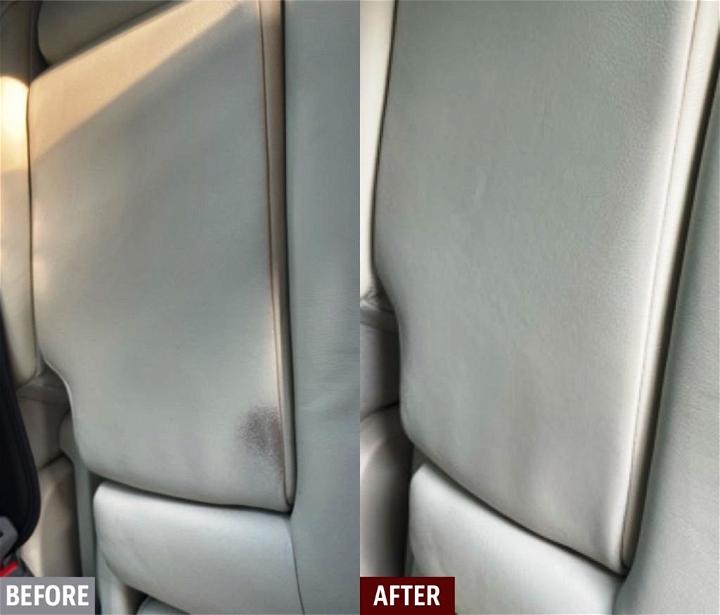
Repairing holes in a leather car seat
Holes in leather are most commonly caused by cigarette burns or sharp objects in pockets. Luckily, however, they are easily repaired, so long as they are small holes. To repair a small hole, you will need a leather repair kit. You will then need to:
1. Clean the leather
Using a clean rag or cleaning cloth, warm water and dish soap to remove any debris and dirt from the leather seats.
2. Trim the hole
Using sharp scissors, carefully trim away the frayed edges and loose threads of the hole on your leather seat.
3. Cut the backing fabric
You should cut the backing fabric into the same shape as the hole, but around half an inch larger.
4. Place the backing fabric
Slip the backing fabric through the hole and glue it into place carefully.
5. Mix filler
Mix a heat set filler or liquid leather and try to get the colour as close to the colour of your leather as possible.
6. Fill the hole
Using filler, fill the holes and then place a textured matt or cloth on top. Use a heat gun to apply heat to the filler through the matt and then leave to cool. When cooled, take the textured matt off.
Repairing big holes or tears in leather car seats.
Trying to fix tears is the hardest job when it comes to leather car seat repair. It is also one of the repairs that is the most obvious – even when done expertly, it is reasonably evident when this repair job has been done. Many people choose to get their seats reupholstered instead. If you want to repair a tear, you should:
1. Clean the leather
Use warm water, soap and a cleaning sponge or cloth to clean away the dirt on your chair.
2. Stitch the leather together
Starting and ending underneath the leather, stitch the two sides of the tear back together. You can then add in liquid leather if you wish. Just ensure the liquid leather that matches your leather’s colour!
Alternatively, you can opt to use leather adhesive, or you can stitch in an additional leather panel between the two sides of the tear 0 this is known as the patch method.
How to prevent damage to your leather upholstery
If you find yourself repairing leather regularly, it is worth investing in a few ways of properly taking care of your leather. Taking proper care of your car’s leather interior will help you to prevent all sorts of damage to the inside of the car. You can do this by:
- Avoiding placing your leather in direct sunlight
- Avoiding bulky and sharp objects
- Condition the leather regularly